
Once upon a time I wrote a blog post about using Capybara with Selenium and Vagrant (which you can still find on the previous incarnation of my blog here) … things have changed a bit since then however: it got easier to run headless browser tests for example (no longer requiring an Xvfb setup) and nowadays Rails even ships with Capybara by default for its systems tests taking away a lot of the complexity of setting it up for developers using the framework.
Capybara with Selenium is still an amazingly good combination for automated testing of web applications in a real browser, so in this article I will revisit running automated browser tests with it on a Vagrant box with the same perhaps somewhat unimaginative little Sinatara application as I did back in 2012.
The example
To follow along with this entire article you will need to have Vagrant, Firefox, geckodriver, Chome (or Chormium) and chromedriver installed. If you are using a Linux distro you can likely install geckodriver and/or chromedriver through your system’s package manager (in Ubuntu you can install both using sudo apt install firefox-geckodriver chromium-chromedriver) rather than having to download them from the pages linked in the previous sentence. You will of course also need a local copy of the example application (called Echo) which you can get from GitHub here.
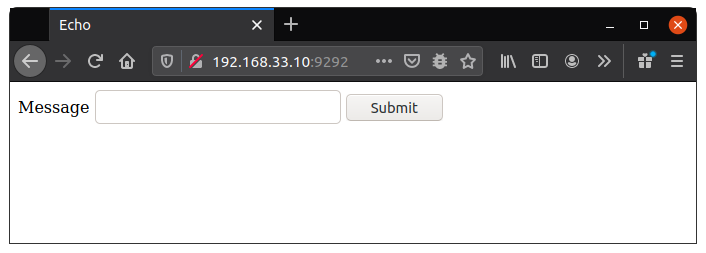
Echo offers an HTML page with one text input and one button. When you click the button it sends a POST with whatever text you entered in the text input, it then renders that back at you with again one text input and one button allowing you to repeat this process as many times as you want.
As I said at the introduction of this article the application itself is not particularly interesting as its only reason for existence is to demonstrate automated browser testing. The tests are found in the file test/echo_test.rb:
require 'test_helper'

class EchoTest < CapybaraTestCase
  def test_echo_that_passes
    visit '/'
    fill_in 'message', with: 'Hello, World!'
    click_on 'Submit'
    assert page.has_content? 'Echo: Hello, World!'
  end

  def test_echo_that_fails
    visit '/'
    fill_in 'message', with: 'Hello, World!'
    click_on 'Submit'
    assert page.has_content? 'Echo: Goodbye'
  end
end
As you can see above there are two tests: on that should pass and one that should fail (because it checks for content that will not be on the page).
The details as to how Capybara is set up are found in test/capybara_test_case.rb:
require 'capybara/minitest'

# Tell Capybara which Rack app to test
Capybara.app = Echo

# Register selenium_remote driver, settings are determined by environment variables:
# * SELENIUM_REMOTE_BROWSER sets the browser to use, defaults to firefox
# * SELENIUM_REMOTE_HOST sets the hostname to use, defaults to localhost
# * SELENIUM_REMOTE_PORT sets the port to use, defaults to 4444 (this matches the geckodriver's default for firefox)
Capybara.register_driver :selenium_remote do |app|
  browser = ENV.fetch('SELENIUM_REMOTE_BROWSER', 'firefox').to_sym
  url     = "http://#{ENV.fetch('SELENIUM_REMOTE_HOST', '127.0.0.1')}:#{ENV.fetch('SELENIUM_REMOTE_PORT', '4444')}"
  Capybara::Selenium::Driver.new(app, browser: browser, url: url)
end

# Set the default driver to based on the ENV variable CAPYBARA_DRIVER, if empty
# this defaults selenium_headless to allow tests with JavaScript.
Capybara.default_driver = ENV.fetch('CAPYBARA_DRIVER', 'selenium_headless').to_sym
# Change the server to webrick since this project is not using puma
Capybara.server = :webrick
# Change where Capybara saves output, the default is tmp in the project root, override with ENV variable
# CAPYBARA_SAVE_PATH
Capybara.save_path = ENV.fetch('CAPYBARA_SAVE_PATH', File.realpath('../tmp', File.dirname(__FILE__)))
# Change the Capybara server host and port based on ENV variables
# These ENV variables are relevant when working with selenium on another machine
Capybara.server_host = ENV['CAPYBARA_SERVER_HOST'] if ENV.include?('CAPYBARA_SERVER_HOST')
Capybara.server_port = ENV['CAPYBARA_SERVER_PORT'].to_i if ENV.include?('CAPYBARA_SERVER_PORT')

# Base test case class to use for tests using Capybara
class CapybaraTestCase < MiniTest::Test
  include Capybara::DSL
  include Capybara::Minitest::Assertions

  # setup is run before each test, it ensures that the Capybara.app_host is
  # set properly, it also applies the set screen size
  def setup
    return if page.server.nil?

    app_port          = Capybara.server_port || page.server.port
    Capybara.app_host = "http://#{Capybara.server_host}:#{app_port}"
    set_screen_size
  end

  # teardown is run after each test, it saves a screenshot if the last test
  # failed and resets Capybara for the next test
  def teardown
    save_screenshot("#{name}.png") unless page.server.nil? || passed?

    Capybara.reset_sessions!
    Capybara.use_default_driver
    Capybara.app_host = nil
  end

  # Set the selenium screen size based on two environment variables:
  # * SELENIUM_SCREEN_SIZE containing dimensions in the format WIDTHxHEIGHT (for example 800x600) or a named
  #   label (iphone_6, desktop, etc.), defaults to desktop (1400x1400)
  # * SELENIUM_SCREEN_TURNED will reverse the values for WIDTH and HEIGHT, this is useful when using a shortcut
  #   like iphone_x and emulate a turned screen
  def set_screen_size
    screen_sizes = {
      'galaxy_s9' => '360x740',
      'iphone_6' => '375x667', 'iphone_6_plus' => '414x736',
      'iphone_7' => '375x667', 'iphone_7_plus' => '414x736',
      'iphone_8' => '375x667', 'iphone_8_plus' => '414x736',
      'iphone_x' => '375x812',
      'ipad' => '768x1024',
      'desktop' => '1400x1400'
    }

    screen_size = ENV.fetch('SELENIUM_SCREEN_SIZE', 'desktop')
    screen_size = screen_sizes.fetch(screen_size) if screen_sizes.include?(screen_size)
    screen_size ||= screen_sizes[:desktop]

    screen_size = screen_size.split('x')
    screen_size = screen_size.reverse if ENV.include?('SELENIUM_SCREEN_TURNED')

    page.driver.browser.manage.window.size = Selenium::WebDriver::Dimension.new(*screen_size)
  end
end
This implementation offers a lot of options that can be influenced through environment variables (you will see a few examples later on this article if you stick around for that) allowing you to run it in different ways on environments. The default settings run the tests against a headless Firefox on a screen size of 1400 x 1400 on a local geckodriver.
Getting the Vagrant box up and running
To get started open a shell and go to the directory where you cloned the repository and enter the command vagrant up to build up and boot the Vagrant box, this may take a while (depending on the download speed of your internet connection) as it will download the Bento project’s Ubuntu 20.04 box if you do not have that in use already.
While the download and provision is running we can take a peek into the Vagrantfile:
# -*- mode: ruby -*-
# vi: set ft=ruby :

Vagrant.configure('2') do |config|
  config.vm.box = 'bento/ubuntu-20.04'
  config.vm.host_name = 'echo'
  @ip_address = '192.168.33.10'
  config.vm.network 'private_network', ip: @ip_address

  # When connecting through SSH forward port 4444 on the vagrant box to 4444 on the host
  config.ssh.extra_args = ['-R', '4444:localhost:4444']

  config.vm.provision 'shell', inline: <<-SHELL
    apt-get update
    apt install -y build-essential libxml2-dev libxslt1-dev zlib1g-dev firefox-geckodriver ruby ruby-dev
    gem install bundler
    cd /vagrant && bundle install

    # Setup the CAPYBARA_SERVER_HOST so you don't have to think about the IP address when using the selenium_remote driver
    echo 'CAPYBARA_SERVER_HOST=#{@ip_address}' > /home/vagrant/.pam_environment
  SHELL
end
The box sets its internal IP address to 192.168.33.10 to enable access through the browser without complicated port forwarding setups, if this IP address clashes with your internal network you can change it to any arbitrary IP internal address.
Just below the IP address definition you see that port forwarding is enabled for the vagrant ssh command to forward port 4444 from inside the Vagrant box onto port 4444 on the host machine, with an active SSH session (started through vagrant ssh of course) this enables access to a running geckodriver on the host machine.
In the last part of the Vagrantfile sits a bit of shell script to install Ruby (in this case for brevity and simplicity through apt), dependencies (including gems), firefox and the geckodriver and to set the environment variable CAPYBARA_SERVER_HOST to the defined IP address through ~/.pam_environment (this file allows you to set environment settings independent of the shell you are using and is the user’s equivalent of /etc/environment).
Let’s run the project itself and try it in the browser. To do this SSH into the Vagrant box using the vagrant ssh command, once inside go to the /vagrant directory and run bundle exec rackup -o 0.0.0.0 to start Echo’s webserver:
vagrant@echo:~$ cd /vagrant/
vagrant@echo:/vagrant$ bundle exec rackup -o 0.0.0.0
[2020-10-25 08:09:26] INFO  WEBrick 1.6.0
[2020-10-25 08:09:26] INFO  ruby 2.7.0 (2019-12-25) [x86_64-linux-gnu]
[2020-10-25 08:09:26] INFO  WEBrick::HTTPServer#start: pid=42070 port=9292
The -o 0.0.0.0 part of the command binds the server to all the box’s IP addresses (by default it only binds to localhost) allowing you to access it from outside. If you now visit http://192.168.33.10:9292 in your browser you will be greeted by Echo’s main page:
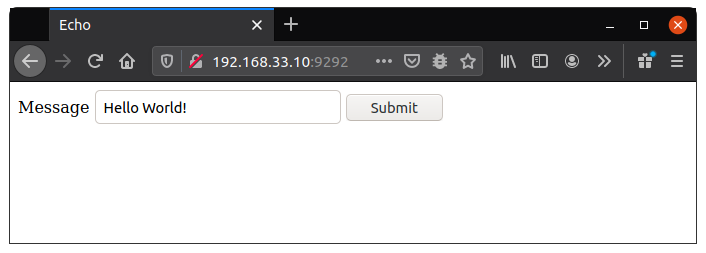
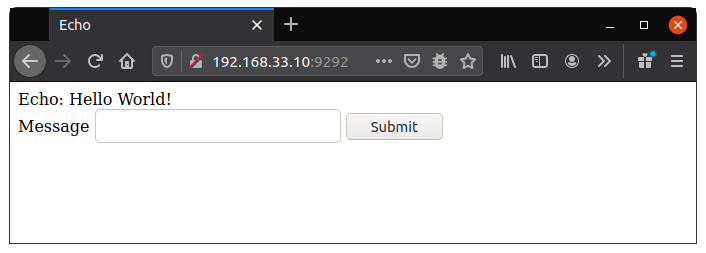
Entering a message and clicking the submit button refreshes the page and echoes the message you entered back to you:
Running headless tests inside the Vagrant box
Running the tests with a headless Firefox is done by starting the command bundle exec rake test:
vagrant@echo:/vagrant$ bundle exec rake test
Run options: --seed 57469

# Running:

/var/lib/gems/2.7.0/gems/selenium-webdriver-3.142.7/lib/selenium/webdriver/common/driver.rb:54: warning: Using the last argument as keyword parameters is deprecated; maybe ** should be added to the call
/var/lib/gems/2.7.0/gems/selenium-webdriver-3.142.7/lib/selenium/webdriver/firefox/driver.rb:31: warning: The called method `new' is defined here
F.

Finished in 5.342355s, 0.3744 runs/s, 0.3744 assertions/s.

  1) Failure:
EchoTest#test_echo_that_fails [/vagrant/test/echo_test.rb:15]:
Expected false to be truthy.

2 runs, 2 assertions, 1 failures, 0 errors, 0 skips
rake aborted!
Command failed with status (1)
/usr/share/rubygems-integration/all/gems/rake-13.0.1/exe/rake:27:in `<top (required)>'
Tasks: TOP => test
(See full trace by running task with --trace)
You can safely ignore the deprecation warnings in the output above, these are related to changes in Ruby and will likely be resolved over time.
For the failed test you will find a screenshot inside the tmp directory of the project that looks something like this:

It may not look like much because the Vagrant box does not have an X server, but it did run inside Firefox.
Running the tests with your own Firefox
Instead of running the tests in headless mode inside the Vagrant box you can also run a WebDriver such as geckodriver natively and have Capybara connect to it from inside the Vagrant box.
Once you have geckodriver installed on your machine start it up:
➜  geckodriver
1603569843485	geckodriver	INFO	Listening on 127.0.0.1:4444
Then run the tests inside your Vagrant box against your local geckodriver like so:
vagrant@echo:/vagrant$ CAPYBARA_DRIVER=selenium_remote bundle exec rake test
Run options: --seed 45518

# Running:

/var/lib/gems/2.7.0/gems/selenium-webdriver-3.142.7/lib/selenium/webdriver/common/driver.rb:54: warning: Using the last argument as keyword parameters is deprecated; maybe ** should be added to the call
/var/lib/gems/2.7.0/gems/selenium-webdriver-3.142.7/lib/selenium/webdriver/firefox/driver.rb:31: warning: The called method `new' is defined here
F.

Finished in 4.339633s, 0.4609 runs/s, 0.4609 assertions/s.

  1) Failure:
EchoTest#test_echo_that_fails [/vagrant/test/echo_test.rb:15]:
Expected false to be truthy.

2 runs, 2 assertions, 1 failures, 0 errors, 0 skips
/var/lib/gems/2.7.0/gems/selenium-webdriver-3.142.7/lib/selenium/webdriver/firefox/marionette/driver.rb:58: warning: instance variable @service not initialized
rake aborted!
Command failed with status (1)
/usr/share/rubygems-integration/all/gems/rake-13.0.1/exe/rake:27:in `<top (required)>'
Tasks: TOP => test
(See full trace by running task with --trace)
While this is running you will see browser windows opening up and closing again, if you look at the failing test’s screenshot you will notice that it looks like Firefox on your own OS (below is a cropped version of mine):

Let’s take a look at how this worked, the answers are all in the file test/capybara_test_case.rb.
First of all the the environment variable CAPYBARA_DRIVER is used to set Capybara’s default driver:
Capybara.default_driver = ENV.fetch('CAPYBARA_DRIVER', 'selenium_headless').to_symThe selenium_remote driver, which is the one we selected, is one that does not exist by default but is defined here too:
Capybara.register_driver :selenium_remote do |app|
  browser = ENV.fetch('SELENIUM_REMOTE_BROWSER', 'firefox').to_sym
  url     = "http://#{ENV.fetch('SELENIUM_REMOTE_HOST', '127.0.0.1')}:#{ENV.fetch('SELENIUM_REMOTE_PORT', '4444')}"
  Capybara::Selenium::Driver.new(app, browser: browser, url: url)
end
It is configured using other environment variables, without those being present it defaults to using Firefox’s WebDriver on localhost and port 4444. Because of the port forwarding setup for the vagrant ssh command done in the Vagrantfile this default works (as long as you have an active SSH session started through vagrant ssh) and connects back to the geckodriver we started on the host machine.
Normally Capybara starts the Rack application it’s testing on localhost and on a random port, if this were the case now we would not be able to connect to it with our Firefox instance (since we cannot reach the Vagrant box’s localhost from the outside).
Capybara.server_host = ENV['CAPYBARA_SERVER_HOST'] if ENV.include?('CAPYBARA_SERVER_HOST')The above line uses the environment variable CAPYBARA_SERVER_HOST (if it is set) to set Capybara.server_host which makes it bind the Rack application to that IP address instead of localhost.
While we did not specify a value for CAPYBARA_SERVER_HOST on the command line it is set in the environment because of the Vagrant box’s provision script, which you can see if you enter the command shown below:
vagrant@echo:/vagrant$ env | grep CAPYBARA
CAPYBARA_SERVER_HOST=192.168.33.10
To ensure that visit calls reference the correct hostname and port the setup method of the CapybaraTestCase sets Capybara.app_host to the combination of the Capybara.server_host and the used port number with the below lines:
    app_port          = Capybara.server_port || page.server.port
    Capybara.app_host = "http://#{Capybara.server_host}:#{app_port}"
Running the tests with your own Chrome
The Vagrant box does not have port forwarding setup for the default chromedriver port, so let’s run the tests against chromedriver without using port forwarding. To do this you have to start the chromedriver like so:
➜  chromedriver --whitelisted-ips
Starting ChromeDriver 86.0.4240.111 (b8c36128a06ebad76af51591bfec980224db5522-refs/branch-heads/4240@{#1290}) on port 9515
All remote connections are allowed. Use a whitelist instead!
Please see https://chromedriver.chromium.org/security-considerations for suggestions on keeping ChromeDriver safe.
[1603611461.262][WARNING]: Unable to read /proc/sys/net/ipv6/bindv6only.
[1603611461.262][SEVERE]: bind() failed: Address already in use (98)
Unable to determine if bind to IPv4 port was successful.
ChromeDriver was started successfully.
As you can see the chromedriver now accepts all remote connections. Let me emphasize that I am only doing this for demonstration purposes, this is not how you want to be doing this normally as the warnings (for good reason) indicate.
To run the tests against your local chromedriver enter the following:
vagrant@echo:/vagrant$ CAPYBARA_DRIVER=selenium_remote SELENIUM_REMOTE_BROWSER=chrome SELENIUM_REMOTE_HOST=192.168.33.1 SELENIUM_REMOTE_PORT=9515 bundle exec rake test
Run options: --seed 9460

# Running:

F.

Finished in 7.910140s, 0.2528 runs/s, 0.2528 assertions/s.

  1) Failure:
EchoTest#test_echo_that_fails [/vagrant/test/echo_test.rb:15]:
Expected false to be truthy.

2 runs, 2 assertions, 1 failures, 0 errors, 0 skips
/var/lib/gems/2.7.0/gems/selenium-webdriver-3.142.7/lib/selenium/webdriver/chrome/driver.rb:56: warning: instance variable @service not initialized
rake aborted!
Command failed with status (1)
/usr/share/rubygems-integration/all/gems/rake-13.0.1/exe/rake:27:in `<top (required)>'
Tasks: TOP => test
(See full trace by running task with --trace)
The above command used the selenium_remote driver configured in the test/capybara_test_case.rb overriding its defaults with several environment variables:
- SELENIUM_REMOTE_BROWSER sets the browser to Chrome (indicating that it wants to talk to a chromedriver)
- SELENIUM_REMOTE_HOST sets the IP address to connect with to 192.168.33.1, this refers to the host machine. If you changed your Vagrant box’s IP address you would enter it’s IP address changing the last element to a 1, inside a Vagrant box this should always to the host machine when using private networks.
- SELENIUM_REMOTE_PORT sets the port to connect to 9515 which is the default port of chromedriver.
The resulting screenshot looks like this on my OS:

A more appropriate way to run the tests against your own chromedriver would be to either add 9515 as a forwarded port over the vagrant ssh connection (like 4444), to specify the Vagrant box’s IP address in the chromedriver’s whitelisted ips or to run the chomedriver on port 4444 like shown below (this requires you to shut the geckodriver first though because you cannot run multiple applications on the same port):
➜  chromedriver --port=4444
Starting ChromeDriver 86.0.4240.111 (b8c36128a06ebad76af51591bfec980224db5522-refs/branch-heads/4240@{#1290}) on port 4444
Only local connections are allowed.
Please see https://chromedriver.chromium.org/security-considerations for suggestions on keeping ChromeDriver safe.
ChromeDriver was started successfully.
Running the tests can then be done like so (with less environment variables):
vagrant@echo:/vagrant$ CAPYBARA_DRIVER=selenium_remote SELENIUM_REMOTE_BROWSER=chrome bundle exec rake test
Run options: --seed 51765

# Running:

.F

Finished in 3.474151s, 0.5757 runs/s, 0.5757 assertions/s.

  1) Failure:
EchoTest#test_echo_that_fails [/vagrant/test/echo_test.rb:15]:
Expected false to be truthy.

2 runs, 2 assertions, 1 failures, 0 errors, 0 skips
/var/lib/gems/2.7.0/gems/selenium-webdriver-3.142.7/lib/selenium/webdriver/chrome/driver.rb:56: warning: instance variable @service not initialized
rake aborted!
Command failed with status (1)
/usr/share/rubygems-integration/all/gems/rake-13.0.1/exe/rake:27:in `<top (required)>'
Tasks: TOP => test
(See full trace by running task with --trace)
Note that you still have to indicate the browser to use, if you try to use Firefox against the chromedriver or Chrome against the geckodriver you would get an error like the following througout your test output:
Selenium::WebDriver::Error::SessionNotCreatedError: session not created: No matching capabilities found.In conclusion
The setup demonstrated in this article is versatile, you can use something like it with a team of people with varying preferences where each individual can use environment variables to match it to their setup (Vagrant, developing locally, external dev server, etc.). It also provides options for running tests on a CI environment without having to change code for it.
If you look at the file test/capybara_test_case.rb you will find that there are a few additional options in there that I did not cover in this article, including environment variables to change the screen size of the browser (allowing you to test the same test suite against different screen sizes), an environment variable to change the path where Capybara saves its files (like screenshots) and finally an environment variable to set the port number of the Rack application launched by Capybara when running the tests. Depending on your setup and needs these may or may not be useful, I’ll leave it up to you to try them.
If you have feedback on this article or have questions based on its contents then feel free to reach out to me on Twitter or through e-mail.
2 Replies to “Capybara with Selenium and Vagrant (without Rails)”
Comments are closed.